
Hi ya’ll! Happy Monday! If you’ve been following me for a while, you’ve learned a bit more in depth on my love for fashion, a bit about me and my type A personality, my family and all that makes me, Me. It’s been so fun learning this past year all the ins and outs of being an influencer, taking photos, posting on social media and opening up about who I am – even the little struggles I face along the way. A bit off the norm style post, or sales guide – todays post fits within all the same. Today I am sharing my most recent key discovery to smiling fearlessly, and how to whiten sensitive teeth at home with Smile Brilliant!

Smiling fearlessly? Yes. Fearlessly. I wish I could see a virtual raise of hands to all who struggle with the ‘say cheese’ photo op. Mine would be present and accounted for. Pearly whites, sadly, aren’t always bright, and in truth – it’s embarrassing. Never frame worthy, nor likable in the least.
Let’s go into a bit of back story – I’ve been blessed with straight teeth my entire life. I was never the one for a braces consult, and I’ve had less than a handful of cavities in my life. Tho the good fortune, keeping my teeth white hasn’t always been so easy. My daily coffee consumption most likely has something to do with it, but I believe the primary reason points to my teeth sensitivity. My dentists thru the years have always advised me to stay away from whitening toothpaste to prevent any discomfort. Tho given, I still desire those pearly whites so I’ve reverted on numerous occasions to achieve a whiter smile.
I’ve never asked about professional office whitening services – Partly because of my sensitivity issue, but more so because of cost. There’s no way I am going to drop hundreds of dollars on a whitening procedure, knowing pain may accompany the price. So, I’ve chosen the affordable route, using OTC strips, and suffering the effects of whitening toothpaste. The affordable route, in reality, isn’t always affordable. OTC strips do add up. Strips do not stay in place long enough to open pores and don’t reach every single tooth, so trips for the re-process become more frequent and over time have quite possibly amounted to an in-office procedure .. oh the struggle of cost vs. comfort. The comical side of me has always justified it with, “it’s the price you pay for beauty, Sarah.” Ha… I am not convinced it’s worth it.
I’ll say it here, thank the good Lord for photo editing apps. Being in the social media spotlight is hard. There’s a lot of comparison, a lot of pressure to be all put together, and there’s a lot of behind the scenes that take place when posting images. It’s not a quick 5 minute, “say cheese” and post. I often have difficulty smiling in photos, for the blog and even with family. Many of my adult year photos have been taken lips sealed. One less thing to do for the photographer’s edit or my own. Up until now, I’ve been at terms with the idea that I may not achieve the whiter smile without a bit of help or pain along the way.
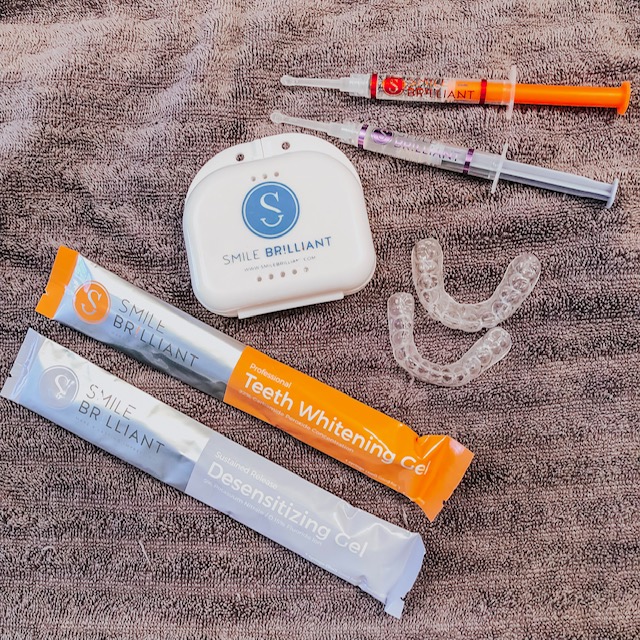
When Smile Brilliant reached out to try their whitening system, I was a little skeptical, a little fearful even. They assured me they offer the exact same, custom-fitted teeth whitening trays as your local cosmetic dentist. By eliminating the dentist and allowing customers to purchase direct, it increases speed delivery and reduces price. It’s FDA approved, 45 day money back guaranteed, vegan, and cruelty free. More importantly, their system can cater to those with sensitive teeth! Their kit includes desensitizing gel to apply after you whiten. Biggest – slightly yellowed, soon to be the pearliest white – smile came across my face. Of course, I’ll give it a go!
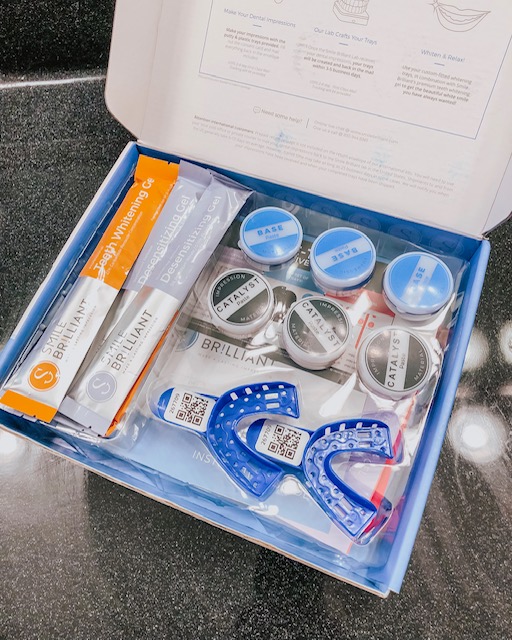
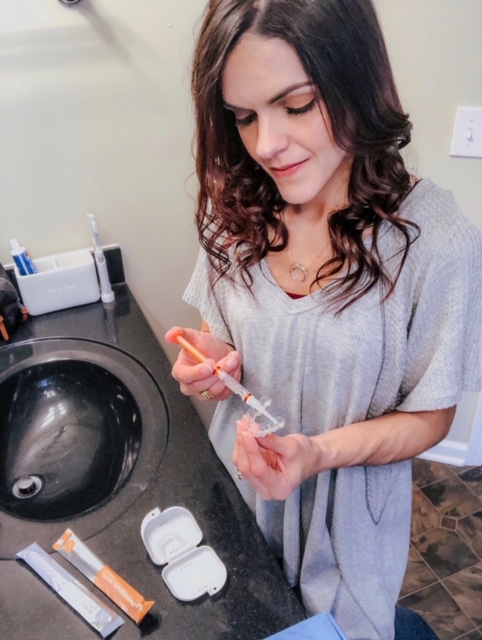
If you’ve been following along with me on Instagram, you’ve seen the process and heard my thoughts. I have a whole highlight sharing the process! They send you a whole kit, complete with base/catalyst formulas to create your own customized trays. In less than a week you’ll receive your customized trays and start the process of whitening in your own home! You start slow, and recommend you whiten for 45 minutes a day and follow with the desensitizing gel. In honesty, the desensitizing gel is what kept me consistent. Sensitivity is very common with all whitening, and my experience likewise. The desensitizing gel helps immensely and I am over the moon excited to see the results of this at home system!
Smile Brilliant has been such an incredible company to work with! I am so happy with my results and the customer service offered throughout the entire process. This program comes with a 100% guarantee and around the clock help if you have questions or concerns. They were so helpful in guiding me to make necessary adjustments to my routine if I felt more sensitivity than normal.
A professional whitening would have cost more than double at the dentist, with multiple (and painful) visits. Here, I’ve achieved a very noticeable, brighter smile with little to no pain during the process. More importantly, I am now smiling fearlessly – I’ve said goodbye to editing apps and hello to a brighter smile!
 Before (left) | After 7 sessions (right)
I’ll note that for best results with this system, they advise to whiten everyday. Due to sensitivity, I whitened every other day over the course of two weeks. The process to whiten has been slower, tho I do see a difference and visible stain removal!
Now smiling fearlessly, I’ve teamed up with Smile Brilliant to give one of you a free whitening system of your own (a $149 value – free!) Click here to enter!
Want to smile fearlessly now with me? Use code thesarahstories15 for 15% off!